
Self Help Support
Please search bellow for the topic that interest you and click on the plus sign for a drop-down menu.
-
Please Read Instructions Completely Before Starting
Steps:
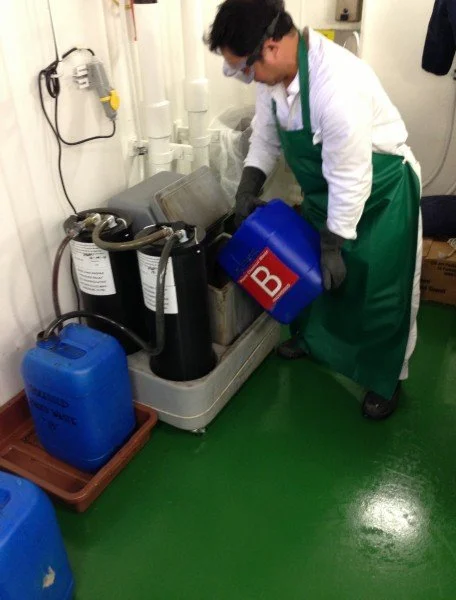
1. Make note of hose placements. Remove new cartridge from packaging and fill new cartridge with water. NOTE: Fill cartridge with water by pouring water through the inlet until water discharges through the outlet. While filling cartridge with water be sure to gently shake the cartridge to remove any trapped air bubbles. Set new cartridge aside.
2. Remove exhausted primary cartridge from silver recovery system, be sure to save hose and fittings as you will use these on the new cartridges.
3. Move secondary cartridge to the primary position.
4. Install new cartridge into the secondary position.
5. Connect all hoses to the cartridges as noted in step 1 making sure inlets and outlets are connected to appropriate hoses. Secure hoses with hose clamps for a leak free installation.
6. Drain exhausted cartridges of all fluid into a container. Drain only water like fluids, stop draining cartridge if any liquid sludge starts to come out of the cartridge
7. Pour the liquid drained from the exhausted cartridge into the receptacle or machine which feeds liquid to the new cartridge.
8. Plug the exhausted cartridge with supplied plugs. Be sure to tighten these plugs all the way
If possible, reuse the packaging the new cartridges came in and ship to:
Att: Horacio Rabini Environmental Reclaiming Services 6231 Mcleod Drive Ste. D-E Las Vegas, NV 89120
-
Testing effluent for silver concentration before / after treatment through S.R.U.
Properly pulling effluent sample and use of a silver test kit will provide you with guidance in making your decision of replacing silver recovery cartridges in use by the silver recovery unit (S.R.U.)
1. First ensure the S.R.U. is operating and pumping solution through cartridges. Wait minimum of 15 min to allow the solution in the tubing and upper chamber of cartridge to be cleared. Testing solution that has been stagnant in tubing or cartridge upper chamber will provide false results.
1. Collect sample of effluent to be tested in the provided 1 ounce cup.
2. Remove a single test strip and wipe with clean paper towel.
3. Have a 30 minute stop watch or suitable timer available.
4. Place approximately 1 inch of test strip into cup with solution to be tested.
5. Observe test strip exposed to solution, silver is detected on wet surface end of test strip once it is darkened or a colored varnish is visible.
6. Silver levels are below 5ppm If more than 20 minutes are required for discoloration to be visible.
7. Rinse cup and save for reuse.
-
Step 1: Turn the machine off and remove the cover from the sru by first removing any metal screw from each side of the cover. Once the screws are removed, gently rock the cover back and forth as you lift up.
Step 2: Un-screw the clear plastic hose elbow fittings connected to the bellows pump. Note: Do not remove the hoses from elbow fittings.
Step 3: Remove O-Ring (1) and Popit Valve from the inlet (side) port of bellows housing assembly. Note the o-ring will come out with the popit valve, be careful not to damage either the popit valve or o-ring if you plan on using these same parts after cleaning.
Step 4: Remove O-Ring and Popit Valve from the pump out (top) port of bellows housing assembly. This can be done by inserting your finger through the inlet port as shown below, or with the use of a small tool. Gently push the popit valve upwards. Note the o-ring sits on top of the popit valve.
Step 5: Clean the popit valve by gently pushing the diaphragm with a small blunt instrument as shown. Doing as described under a gently flowing stream of water will help clear any debris being held by the popit valves diaphragm.
Step 6: Place new or your recently cleaned popit valves and o-rings into the bellows hosing assembly. Note popit valve points inward on the pump out (top) port. For the inlet (side) port the popit valve points outward. Ensure the o-rings will make contact with the fittings by inserting them after the popit valves are placed in the bellows housing assembly.
Step 7: Insert hose fittings back into bellows housing assembly by first pulling back the sleeve that will hold the fitting in place. Insert fitting into bellows housing assembly so it is fully against the bellows housing assembly then screw the sleeve into bellows housing assembly by hand and tighten until snug. Note: DO NOT USE ANY TOOLS TO TIGHTEN SLEEVE, this will cause damage to sleeve.
Step 8: Replace cover and turn the machine on.
-
AMS SRU Pump Flow Rate Adjustment
The AMS silver recovery pumping unit utilizes a GRI bellows pump with an adjustable pump rate setting. Pump is found under the back cover held in place with 3 stainless steel screws. Take care on the removal of back cover as to not pull on the hose or wiring cables located inside.
The pump has a maximum rate of 120 ml/min and the setting can be adjusted by simply turning the set screw located on the pumps bellows cam.
Factory setting of pump is between 45% and 50% this provides a flow of solution between 54-60 ml/min.
If increasing flow rate, keep in mind more volume of solution will flow through the silver recovery columns and they will be exhausted accordingly. However the net result of gallons processed per column will be the same.
T12 silver recovery columns are rated at max of 600 gallons. Example, every 6 months a column is replaced having processed 600 gallons utilizing the AMS SRU with factory pump setting. If the pump rate is increased to 100% you can expect to process 600 gallons in 3 months. Additionally, increasing pump rate may require the use of a T20 silver recovery column in order to meet compliance levels.